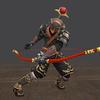
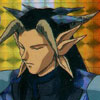
Gen'ei Ryodan - Conal damage, stun, and a single dispel (removes 5 shadows)
50%: Uses Perfect Dodge
30~0%: Weapon breaks again, resummons any defeated adds, and casts Utsusemi: San frequently. Loses the en-death effect while adds are out and will use Phantom Whorl as well as Enforce (on VD only). The Bigwig may be silenced to stop the Utsusemi spam, but this will require an immunobreak to land. When the Bigwig is at 30% or lower the adds will gain access to a move named Triple Reversal (see Adds section below).
Genku Bakken / Phantom Whorl - Very high Physical Damage damage single hit attack, absorbed by shadows. Has a short range (~'10)
This move will generally 1-shot players. It is recommended to shadow tank the NM at around 30% HP and under as even with Indi-Wilt and Damage Taken equipment the move will still do ~3-6k damage.
You may also run out of range of this move.
Sontaku Daikyoyo / Enforce - 15' AoE drain based on the current player's HP. This move can not drain more HP than the player has, and returns more HP than is drained.
Frequent use of this on players with high HP will render the Bigwig undefeatable. Players must fight with a lower HP to return less to the Bigwig when it is used.
Adds:
Adds are immune to sleep.
Adds will use their respective 1-hour special abilities and standard Qutrub TP moves.
The Astrologers will cast typical BLM spells including, T4 nukes, Sleep II, Poisonga, and Ice Spikes.
The Astrologers are susceptible to silence. BigWig 30%~0%:
Triple Reversal - Drains HP from the target based on unknown conditions. This effect can be seen draining over 30,000 HP from a player.
Caused by having 3 or more adds (including the Bigwig) on a target at a time. Player may outrun this move if kiting.
The rate of activation on the Bigwig's endeath effect increases the more players continue to damage the Bigwig.
The effect is removed once the adds have been defeated.
Food is required! Killing faster as non-NIN is more important since less time spent in the battle which is less room for error. Being stunned with no shadows up isn't a big deal in this fight and buffers should reapply buffs immediately (as you unstun) if you lose them or they're trash. We usually only want WAR and DRK this month since NIN DD is crap compared to those jobs.
Yeah, 2h empyrean is beastly this month, lol. I have no doubt that empyrean nin would be the most optimal choice because of dmg and more shadows.
But vast majority of NIN that I've seen, do mediocre dps and die/got dispelled anyways. I don't know one single nin hardcore enough to do empyreans.
Not sure if something changed from last time but any DPS should be able to hit 99k WS this month. My BRD is hitting 99k Mordant Rime every time with just BRD buffs (no COR, no GEO, just honor/madrigal/minuetx2 and Dia3 from RDM). Pretty sure our NIN was hitting cap damage on every WS as well. Setup is NIN PLD RDM BRD...and 2 spots for uh. Stuff.
1)Mewing Strategy: This is the most reliable strategy, with reasonable clear speed. *See Kishr's video posted above.
PLD or RUN, DD/NIN or NIN/WAR, RDM/NIN, COR/NIN, BRD/NIN, SMN.
DD pulls NM to the corner and tank kites adds around the pillar when they spawn. BRD keeps elegy on Bigwig.
DD keep shadows up to prevent endeath kill, rdm keeps dia3, slow II on megaboss, silence on astrologers when they pop, then dps when they are not casting. SMN cure the tank.
At 30% tank stop kiting and hold all mobs away from megaboss in one place so mewing lullaby can land on all the adds, smn spams mewing lullaby on cooldown to prevent Triple Reversal fires off. Rdm will need to recast silence on Astrologers as soon as silence wears off.
At 30% when NM spams enforce, just let the DD sit at single digit HP. Nin should toss some vokes before wsing to help the lesser shadow DDs eaten by a potential multi attack.
2)Kiting Strategy: This strategy is identical to mewing strategy except the tank kites all the adds from start to finish, no mewing lullaby used. Healer will need to silence the adds.
3)Killing Adds Strategy: This strategy is the slowest strategy but most reliable of all. Instead of kiting adds, DDs will kill all adds that spawned. There are 2 waves of adds total. Once adds are dead, NM will no longer us endeath nor triple reversal, therefore removed all the potential possibility to wipe.
PUPx2 COR SMN PLD and any mage capable of Silence. PLD tanks adds in corners with SMN mewing while dual PUP engage matons on boss in the center, as pets are immune to the Qutrub's Endeath, unlike Wrathare's.
Maton setup is Beast/Companion's; VE head/SS body; Wind/2x Fire; dual Inhibitors but no Speedloaders (skillchains always cap dmg and Speedloaders just slow them down) and just let the matons continuously 3-step skillchain on boss. At around 50%, the boss will PD, after which you can switch to Light/Thunder/Fire and use OD to zerg down the remainder of the boss's HP. The 3m20s duration of OD is enough to take out about 50% of the boss on D with 10-15s of duration to spare. A PUP/RDM should also Diaga to wipe Utsusemi: San shadows.
It may be kinda slow compared to using real DD setups, but it's pretty safe and easy as you don't need to worry about Triple Reversal, shadows, endeath, dispels or the like. And OD is pretty easy to reset with Wild Card as even a 5 will work.
I seem to remember this one being absolutely hilarious with multiple Armageddon CORs as DPS. Get the benefit of Triple Shot (that can be maintained all fight with 3 CORs), Empy aftermath, and wonderful hate properties of Wildfire.
Didn't bother kiting the adds on VD last time I just stood there and tanked with with Priwen at the time as I hadn't bothered finishing ochain. Didn't need curing from an actual as I took *** all damage if a spell started going off I switched to Aegis but that was only when we took the Linkshells lolrdm. should be even easier now with Majesty being a thing I can cure my self in capped SIRD and capped Cure pot.
Can the adds attack be floor'd to the point a non-tank can hold them?
assumption: idris BoG + EA wilt: atk-126.25% & Phalanx II dmg-40~
DRK's have Smite for atk+29.6%.
Seeing his dmg is high but capped, isn't it something to use that breaks the damage cap like barrage or hot shot?
Here's a screenshot I took back when this ambuscade appeared in December 2018- Corsair Tripleshot:
As you can see, each individual shot is not capped, and because the game processes each one at a time, the total damage isn't susceptible to that hard cap. (The 100k+ damage shown is due to Battlemod compressing the attack round into one line, but still shows crit hits vs non-crit as unique damage, hence the 3rd shot showing up by itself and not being compressed like the first two).
Barrage does exceed the cap on him as well, but considering the timer it isn't something worth relying on. Hot Shot in my book might give great damage, but I'd rather in this fight get the benefits on Enmity that Wildfire brings to the table. Annihilator RNGs also are quite viable for the same reasons.
Seeing his dmg is high but capped, isn't it something to use that breaks the damage cap like barrage or hot shot?
Here's a screenshot I took back when this ambuscade appeared in December 2018- Corsair Tripleshot:
As you can see, each individual shot is not capped, and because the game processes each one at a time, the total damage isn't susceptible to that hard cap. (The 100k+ damage shown is due to Battlemod compressing the attack round into one line, but still shows crit hits vs non-crit as unique damage, hence the 3rd shot showing up by itself and not being compressed like the first two).
Barrage does exceed the cap on him as well, but considering the timer it isn't something worth relying on. Hot Shot in my book might give great damage, but I'd rather in this fight get the benefits on Enmity that Wildfire brings to the table. Annihilator RNGs also are quite viable for the same reasons.
I'd be more worried about pulling hate with Archery any day than with the options available via Marksmanship. Hate management is always a bigger issue when using ranged as your primary damage-dealing method, and throwing in en-death makes it an even bigger concern.
Never let more than 1 mob attack any player cause they'll triple reversal (insta death basically) and they have regain so you can't hold them without the mews.
Never quite fully figured out exactly what triggers the triple reverse but it seemed like anytime I had 2 mobs on me, it happened. The 3rd+ mob would always break away from whoever had it getting me killed u_u
I guess another question for Celebrindal, What if I were to use a path C SU5, Righteous/Scout's bolts, using Wildfire and a PUP maton tank?
That's the one ranged RMEA that I don't have experience with. I could see it giving good numbers, but likely less than Anni or Arma with their aftermaths that multiply already good base damage in TP phase. But it would be interesting to see how it holds up.
A lot of stuff can mess up the kiting strat but iirc tank/smn + whm/rdm/sch/smn can chill in a corner and hit a mew macro every 30s(between them). The only really important part is keeping the BLMs silenced. I believe you only need 2 if the PLD is taking 0 but I might be mistaken and you need a 3rd to mirror a maxed smn.
PLD keeps up mana with Ochain/Chivalry/initial refresh3.
WHM can do a quick run over to grab refresh III/ballad part way through if needed.
As long as the BLMs are silenced, the caits can just chill out.
Gen'ei Ryodan - Conal damage, stun, and a single dispel (removes 5 shadows)
50%: Uses Perfect Dodge
30~0%: Weapon breaks again, resummons any defeated adds, and casts Utsusemi: San frequently. Loses the en-death effect while adds are out and will use Phantom Whorl as well as Enforce (on VD only). The Bigwig may be silenced to stop the Utsusemi spam, but this will require an immunobreak to land. When the Bigwig is at 30% or lower the adds will gain access to a move named Triple Reversal (see Adds section below).
Genku Bakken / Phantom Whorl - Very high Physical Damage damage single hit attack, absorbed by shadows. Has a short range (~'10)
This move will generally 1-shot players. It is recommended to shadow tank the NM at around 30% HP and under as even with Indi-Wilt and Damage Taken equipment the move will still do ~3-6k damage.
You may also run out of range of this move.
Sontaku Daikyoyo / Enforce - 15' AoE drain based on the current player's HP. This move can not drain more HP than the player has, and returns more HP than is drained.
Frequent use of this on players with high HP will render the Bigwig undefeatable. Players must fight with a lower HP to return less to the Bigwig when it is used.
Adds:
Adds are immune to sleep.
Adds will use their respective 1-hour special abilities and standard Qutrub TP moves.
The Astrologers will cast typical BLM spells including, T4 nukes, Sleep II, Poisonga, and Ice Spikes.
The Astrologers are susceptible to silence. BigWig 30%~0%:
Triple Reversal - Drains HP from the target based on unknown conditions. This effect can be seen draining over 30,000 HP from a player.
Caused by having 3 or more adds (including the Bigwig) on a target at a time. Player may outrun this move if kiting.
The rate of activation on the Bigwig's endeath effect increases the more players continue to damage the Bigwig.
The effect is removed once the adds have been defeated.
Food is required! Killing faster as non-NIN is more important since less time spent in the battle which is less room for error. Being stunned with no shadows up isn't a big deal in this fight and buffers should reapply buffs immediately (as you unstun) if you lose them or they're trash. We usually only want WAR and DRK this month since NIN DD is crap compared to those jobs.
Yeah, 2h empyrean is beastly this month, lol. I have no doubt that empyrean nin would be the most optimal choice because of dmg and more shadows.
But vast majority of NIN that I've seen, do mediocre dps and die/got dispelled anyways. I don't know one single nin hardcore enough to do empyreans.
Not sure if something changed from last time but any DPS should be able to hit 99k WS this month. My BRD is hitting 99k Mordant Rime every time with just BRD buffs (no COR, no GEO, just honor/madrigal/minuetx2 and Dia3 from RDM). Pretty sure our NIN was hitting cap damage on every WS as well. Setup is NIN PLD RDM BRD...and 2 spots for uh. Stuff.
1)Mewing Strategy: This is the most reliable strategy, with reasonable clear speed. *See Kishr's video posted above.
PLD or RUN, DD/NIN or NIN/WAR, RDM/NIN, COR/NIN, BRD/NIN, SMN.
DD pulls NM to the corner and tank kites adds around the pillar when they spawn. BRD keeps elegy on Bigwig.
DD keep shadows up to prevent endeath kill, rdm keeps dia3, slow II on megaboss, silence on astrologers when they pop, then dps when they are not casting. SMN cure the tank.
At 30% tank stop kiting and hold all mobs away from megaboss in one place so mewing lullaby can land on all the adds, smn spams mewing lullaby on cooldown to prevent Triple Reversal fires off. Rdm will need to recast silence on Astrologers as soon as silence wears off.
At 30% when NM spams enforce, just let the DD sit at single digit HP. Nin should toss some vokes before wsing to help the lesser shadow DDs eaten by a potential multi attack.
2)Kiting Strategy: This strategy is identical to mewing strategy except the tank kites all the adds from start to finish, no mewing lullaby used. Healer will need to silence the adds.
3)Killing Adds Strategy: This strategy is the slowest strategy but most reliable of all. Instead of kiting adds, DDs will kill all adds that spawned. There are 2 waves of adds total. Once adds are dead, NM will no longer us endeath nor triple reversal, therefore removed all the potential possibility to wipe.
PUPx2 COR SMN PLD and any mage capable of Silence. PLD tanks adds in corners with SMN mewing while dual PUP engage matons on boss in the center, as pets are immune to the Qutrub's Endeath, unlike Wrathare's.
Maton setup is Beast/Companion's; VE head/SS body; Wind/2x Fire; dual Inhibitors but no Speedloaders (skillchains always cap dmg and Speedloaders just slow them down) and just let the matons continuously 3-step skillchain on boss. At around 50%, the boss will PD, after which you can switch to Light/Thunder/Fire and use OD to zerg down the remainder of the boss's HP. The 3m20s duration of OD is enough to take out about 50% of the boss on D with 10-15s of duration to spare. A PUP/RDM should also Diaga to wipe Utsusemi: San shadows.
It may be kinda slow compared to using real DD setups, but it's pretty safe and easy as you don't need to worry about Triple Reversal, shadows, endeath, dispels or the like. And OD is pretty easy to reset with Wild Card as even a 5 will work.